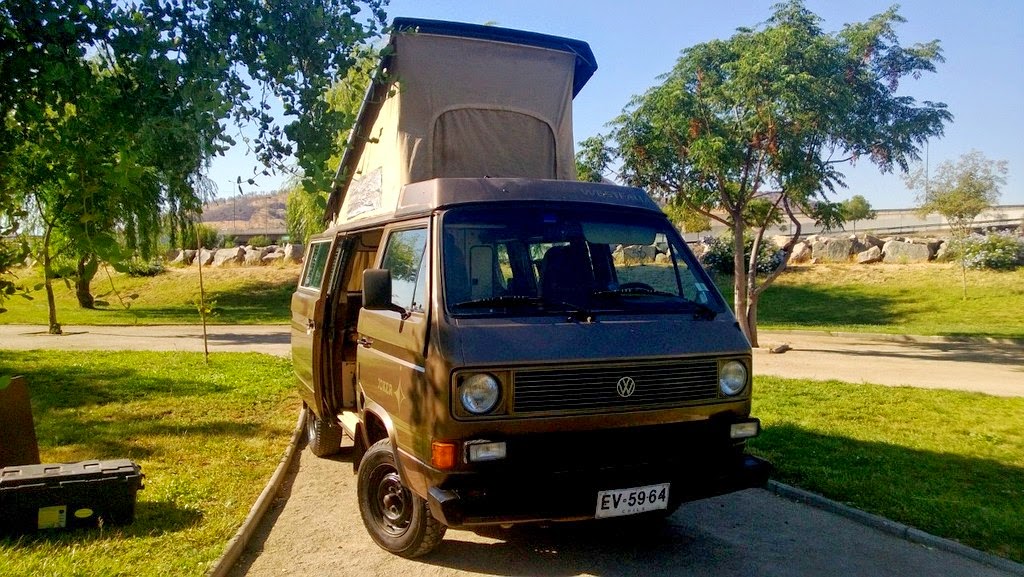


Though our old tent was original (from 1985!), the tape left sticky residue everywhere and liked to pull hair. Our new tent is made of the same style/color canvas as the original (for breathability and light), and has three big windows, each with bug screens.
This tutorial will show our experience with the removal and installation. We also talk about cleaning the roof and flocking, as well as making and installing “accessory loops” that will act as anchor points for things like laundry lines and our tarp/awning.
You’ll see a few photos of Ben consulting his phone, watching GoWesty’s instruction video about tent installation. We watched this video a few times before starting this project, as well as a few times during. Thanks GoWesty!!
Since we live in a downtown apartment in Concepcion, Chile, we don’t really have much access to lawn space and outdoor water. We asked our friends, La Familia Meier-Cabas if we could use their house in the suburbs for our project. We offered to bring meat and our dutch oven for a BBQ and they agreed. We started work around 2pm and “finished” at around 11pm. We also took an hour-ish BBQ break while the roof was drying in the sun.
The tent removal/install is essentially a one-person job, but it is vital to have four adults available for moving the fiberglass top around. Ben did most of the work, but I helped him finesse some tricky corner installation parts and provided companionship.
Here’s the stuff we used:
- Utility Knife
- Screwdrivers: philips and flat head; manual and electric
- 4 sturdy stools covered with towels
- Zip-ties (for strapping down the lift bar)
- Vaccuum (to pre-clean the roof)
- Rags (to clean the roof of the van before re-install)
- Bucket
- Scrub brush
- Liquid bleach
- Liquid dishsoap
- Garden Hose
- Power washer (our friends had one, it was nice)
- Pliers
- Little hammer (Gepetto, Toy-Maker style)
- Container for loose screws
- 6 sewn ribbon accessory loops
- Headlamp

We enlisted a few of our Chilean friends to help us remove the roof from Jules, our Westy. With the roof off we also had the chance to scrub clean the flocking, which, we think, was the first time for this to happen. There was mold everywhere!

In a large bucket we mixed some Clorox (I didn’t measure…a few good splashes?), a good squirt of Dawn dishwashing soap and a couple gallons of water. We then poured that in the roof of our Westy, which was propped on some towel-covered stools. We scrubbed the flocking clean with some scrub brushes (the stiff bristles were fine and didn’t damage the flocking).
After we were satisfied the roof was clean, we drained the excess cleaning water from the roof into a bucket. It only took a few of us to prop the roof up against the fence in the sun in order to rinse and dry. Wells did a few rinses with a power washer (but a regular hose would have worked too) and we fired up the BBQ while we waited for it to dry.
It’s incredible the difference before and after cleaning!


The old tent was installed into the roof with the aid of 8 little wooden pegs in the corners and sides. The pegs were staple gunned to the “bead” of the tent and both the pegs and the staples need to be removed and used again.

I used a pair of pliers to help take the staples out carefully (they’re old!). I just positioned my pliers on one of the staples points and the back of the peg and pressed gently. The staple loosened and popped out easily. I stuck them gently back together to keep as fitted pairs, and we started the tent install.
After double checking that the tent was laid out in the correct orientation (our friend Adam was devastated to find he accidentally installed his tent upside-down and gave us a good warning), Ben got to use this little hammer. It belonged to our friend Claudio’s father and was used for cabinet making back in the day. Ben felt like he was working in Santa’s workshop or something. It was pretty cute.

After double checking that the tent was laid out in the correct orientation (our friend Adam was devastated to find he accidentally installed his tent upside-down and gave us a good warning), Ben got to use this little hammer. It belonged to our friend Claudio’s father and was used for cabinet making back in the day. Ben felt like he was working in Santa’s workshop or something. It was pretty cute.
While Ben was busy
fitting the tent to the roof (I only had to help with some corners), I made my
little accessory loops out of some sturdy, flat, Chilean-colored ribbon. They
sell this for decorating hats and other stuff during their Fiestas Patrias
in September—a week-long celebration of Chile’s Independence. I already had
some, so I figured Jules would appreciate us giving little nods to her Chilean
heritage. Anything to keep her happy.

I made 6 loops out
of 6” long strips, enough for 3 accessory loops on each side of the tent. (We
plan on using them to attach our tarps to make a sunshade or whatever else
comes up.) All I did was double over the end of the ribbon and stitch with
nylon thread. This provides enough of a lip to help keep the ribbon in place
when it is weighted. We installed them along the tent, with the loops sticking
outside of the tent, one on each end and one in the middle. You could put more
loops on, but we felt 3 would be enough. We’ll see as time goes on, I’m sure.

Night fell and our
roof was still off the van. We put our headlamps on and gathered our friends to
get the roof back on Jules. Ben made sure the alignment of the roof and
sprocket things was just so, and we got a first glimpse of what Jules will look
like with her new “hairdo.”

Ben took a moment to consult GoWesty’s video...again, and got back to work.


9:30pm and time to
start installing the tent to the van! I forgot to mention that this was a
Sunday night, and both ours and the Meier-Cabas children had to go to school in the morning.
Time to hustle.

We installed our
accessory loops in the front, middle and back of both sides of the tent. We
just slipped the loop under the tent and metal strip and screwed it in. The sewn lip
will help keep it in place once it is weighted.
Many people install
a simple roll-up shade this same way, one that tucks into the roof when it’s
closed. For our shade we decided to keep it removable so it can run the entire length of the van. We’ll just use our 2 x 2.5 meter long tarps. We can strap them onto
these loops in the middle, and also use small binder clips on the front and
back gutters.
After a relatively easy start screwing down the front, Ben needed to install the back of the tent. He has never had a problem with
confined spaces, but he was not enjoying this part at all. We had the roof
lowered and propped on a stool to give slack. From what I heard the problems
were, “Aaaah, it’s so tight!” and, “Aaaah, this f***ing elastic!” and, “This
totally sucks!” Now, Ben is a pretty easy going guy, so to hear him complain so
frequently and with swears, told me that this part was rather frustrating.


For the tent’s
plastic bead to turn the tight corners, a little surgery was needed. Ben cut
notches in the plastic with a utility knife. You can see the little point in
the photo. From the grunts I heard, this part was frustrating as well.
Well. Now the time
was 11pm and only the front and back sides of the tent were installed. It was
time to call it quits and save screwing down the sides for another time. (Unfortunately,
I wasn’t around to take photos of this part, but it was pretty
straightforward.)

Here’s a shot showing the installed accessory loops. We put three on each side, so we can have double shade action.


Thanks again to La
Familia Meier-Cabas for their (extended) hospitality and help!
